Saying Goodbye to Summer

Posted on


The end of summer is always busy for us because our daughter and many of her friends have birthdays.  With those birthdays come lot’s of birthday parties.  Which are tons of fun but keep this bee super busy!  Here’s a little something that we wrapped up our summer with.  Our friends had a pool party for their son and another friend’s son.  I asked to contribute decorations and favors as my present; which they wanted to keep simple.  So here is a shadow box I made featuring one of the birthday boys.  I used the Artbooking cartridge and it was so fun, quick, and simple to make.  If you’re not familiar with our Artbooking Cartridge it is awesome and geared toward making layouts.  It’s all coordinated so you set your dial to 11″ and everything cuts to the proper size.  I used our Seaside Collection and some coordinating cardstock.  The blue background page is really neat because it looks like a wall you would see at the beach.  I also used the Seaside Assortment to add some bling without making it girly.  These things are awesome!  They would be great on favors or any other sort of decorations.

 photo leightonsshadowbox.jpg

I also used our Art Philosphy cartridge to make these banners.  Then I used the Seaside Complements to decorate the spaces.  Great way to decorate but keep everything simple! photo leightonbanner.jpgIn all my excitement I forgot to get a picture or the favors.  They turned out really awesome! made pillowcase boxes and put kinetic sand in them to keep with the beach theme.  I used the Treasured Memories stamp to label a buckle piece cut on White Daisy cardstock and put a zip strip through it.  The kids loved the sand and I was happy with how everything turned out.  So for now we say goodbye to summer and get ready to celebrate over the next 4 months!


Designed Decor Frame

Posted on

I hope you’ve had some time to take a look at the new Annual Inspirations Idea Book.  If you haven’t then click here and check out all the new stuff! Today I want to talk to you about some of our awesome home decor products!  You can do so much more with paper than layouts and cards.  Many times I’m very reluctant to hang up frames in my house because I feel like it’s such a hassle to change out the pictures.  So here’s your solution.  I recently worked with our Designed Decor Colonial White Frame.  It’s amazing!  It’s a chicken-wire style frame so you can just clip your pictures up.  Changing pictures out is a breeze and you can put anything on it.

We have mini clothespins or hook clips that you can use to hang anything up. Remember you can use our cricut cartridges to cut out frames, pennants, and other shapes to make it even easier.  You can even use our Picture My Life packages to decorate this and never have to cut one thing.

Here’s what the back of the frame looks like.  There are 2 hooks so you can do vertical or horizontal.  photo DSC_9854.jpg The wire is held in very securely and you can see that the frame is very sturdy.  photo DSC_9853.jpg   Here’s my finished frame.  I think I’m going to add some bows on the corners of the banner just to give it a more polished look.  photo DSC_9849.jpg I had a nail in the wall already and thought this would be a great place for it.  photo DSC_9894.jpg   Here it is in its new place.  photo DSC_9895.jpgWe have tons of new frames and they all look wonderful.  So check them out.  Head over to my site and pick one up today!  Remember if you have a party (Online or Home) of $250 or more you could get this frame for half-off and get $40 in free product!  So contact me today and let’s get started.


It’s here! Annual Inspiration Book 2014

Posted on

The new Annual Inspiration Idea Book is here!!!  You can check it out by clicking here.


We have so many new products to check out and the paper themes are adorable.  I’ve been a little absent because we just had my little girls 5th birthday… and guess what.  There’s a perfect theme for birthdays!!!  So expect to see all the awesome things I made over the next week.  While you’re waiting though take a look at the Idea Book and these videos that I’m posting.  There’s a great new cricut cartridge, new markers, and tons of other stuff!  This idea book will be valid for 1 year and we will have 2 smaller additions coming over the year.  The Cricut cartridge is expected to be in stock in September.  Want to host a party so you can earn it for half off?  Just let me know!

https://www.youtube.com/watch?v=3Awh96-AXRM


Pop-Up Butterfly Cards

Posted on

I recently found this neat tutorial for a pop-up card and had to try my hand at it.  The instructions may seem intimidating at first but it was so much fun and pretty easy once I got the hang of it.


For the first one I used the Ivy Lane Paper Packet, A Mother’s Love hostess stamp, and the Cricut Artbooking Cartridge.  To make things “float” you use an acetate sheet.  Since I hate to throw anything away and am always trying to recycle everything I actually had an acetate sheet.  I had ripped it out of the front of toy packaging we were going to throw away.

Here’s a picture of it folded flat for mailing:

 photo DSC_9811.jpg

 photo DSC_9830.jpg

 photo DSC_9834.jpg

Here’s one using the Ariana paper packet.

 photo DSC_9843.jpg

 photo DSC_9839.jpg

I was really happy with how they turned out!  If you’d like the instructions head over to Splitcoaststampers and try one of your own.

If you love that stamp set that I used make sure you host a party this month!  The only way to get this stamp is by having a $150 party and using your free product credit.  If you want to have a party just contact me and do it soon because this stamp retires July 31!


Butterfly Display with Cricut Artbooking Cartridge

Posted on

Welcome to July!  It’s my birthday month so to celebrate I’m going to be posting all sorts of artwork and giveaways.  Be sure to subscribe so you don’t miss out 🙂

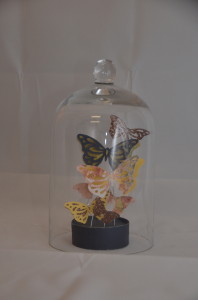
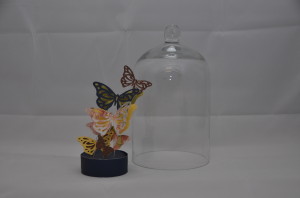
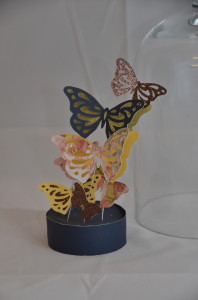
To start off I wanted to show you this fun display I made with the Cricut Artbooking cartridge.  I cut the butterflies using various sizes and put them on floral wire.  I took some floral foam and covered it with cardstock using liquid glass.  I put the wire into the base and then secured my butterflies in various places.  I wanted to make a bigger display but this was the biggest bell jar I could find at Michael’s.  If I ever come across a bigger one I will definitely upgrade this project.  It was super easy but has such wow-factor!

I made this one using our Ariana paper packet which will only be available until July 31.  I also used our brown glitter paper.  Let me know what you think 🙂

DSC_9789


Heres a few without the bell jar:

DSC_9794


DSC_9795


Time to be a Hostess!

Posted on

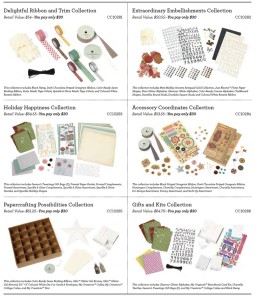
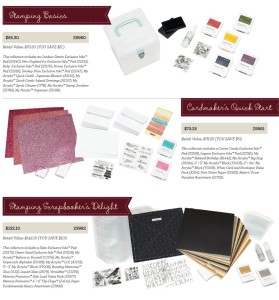
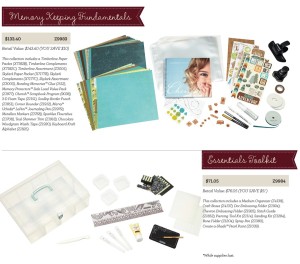
Time to get started or stock up! Because it’s our founder’s 30- year anniversary she’s running some great specials. Want to know how you can get $251.05 of products for $168.40 (plus tax and shipping)? That’s a savings of $82.65!!! Host a party. You don’t have to actually have a party but let me set one up for you. When you purchase one of the “Fab Five Bundles” you qualify for the June special and the stamp of the month. As long as your purchase and gift collection add up to $150 you get $25 in free product for hosting the party.  You can even get 1 gift collection for every $50 you spend to save even more. For example: Purchase the “Memory Keeping Fundamentals” bundle, the stamp of the month, and the “Gifts and Kit’s Collection” for $168.40. Then you get to pick $25 of qualifying product. That’s $251.05 worth of stuff! The combinations go on and on. Really want to stock up? Get your party up to $250 and get $40 in free product and can purchase one of the half-price hostess bundles. You can get $455.55 for only $303.95 that way. That’s a savings of $151.60! It’s amazing how much stuff you can get right now for a great price so take advantage. Email me and we can get your party started right away. These gift collections are while supplies last, so hurry before they run out.  So contact me today to host your party!

Gift Collections available while supplies last:

hostess1

Bundles Available through July 31:


hostess2

hostess3


Tea Time for little ladies

Posted on

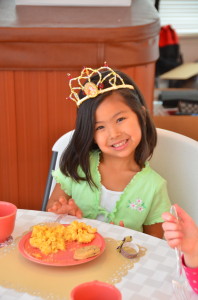
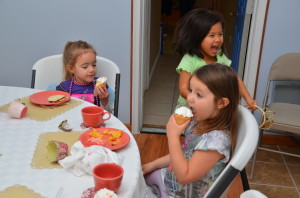
So about a month ago I decided the I wanted to have a tea party for my little girl and her friends.  When I saw the Ivy Lane paper packet I knew it would be perfect.  Plus I always love having themed parties where everything matches.  It’s so fun to see how everything turns out in the end.  This is a picture heavy post but hopefully you will get some ideas.  Please feel free to contact me if you have any questions.  I thought about posting my Cricut cuts for every single thing I made but I just kind of went Cricut crazy and forgot to write it all down as I was going.  It was all done with my CTMH Artiste and Artbooking cartridges.

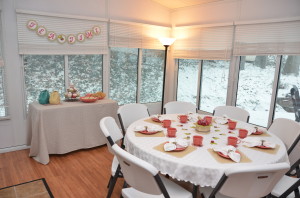
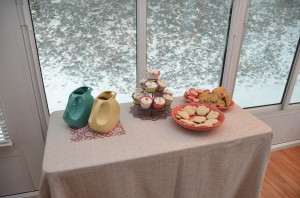
DSC_7163This is what the whole set up looked like.  We actually had a horrible snow storm that day and ended up with a few inches accumulation during the party.  Roads were closed and everything so THANK YOU to all of our friends that made it.  I wish everyone could have!

DSC_7084


DSC_7112

DSC_7195


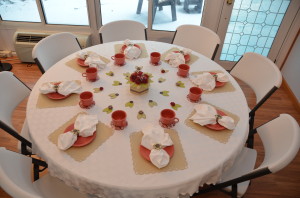
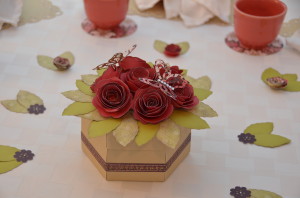
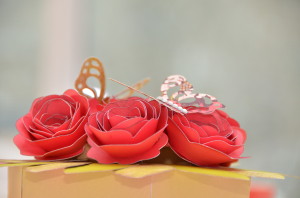
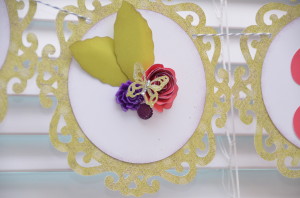
I made this centerpiece using the Artiste Cartridge.  Everything you see there is cut from the cartridge.  The box didn’t have tabs to keep it together so I used a zip strip and adhesive to put it on the outside.  I also added some extra cardstock to raise it and give me something to adhere the roses to.  Don’t forget the Liquid Glass!  It was so useful and for this whole party I only used 1/4 a bottle.  The napkins and tablecloth came from Kroger.  All of the tableware came from the Fiesta Factory Outlet.  I was so excited to find that they had pink in the “seconds” section so I didn’t really care if the girls broke any of it.  The best part is that it matches the Ivy Lane colors perfectly!  It’s a total match for our Hollyhock ink and cardstock.

DSC_7117


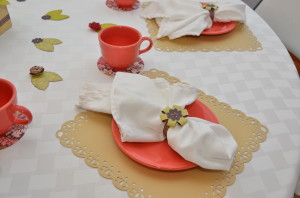
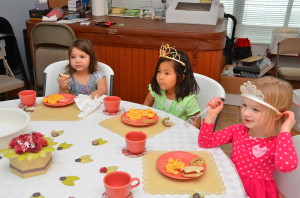
Here is the place setting for each child.  I didn’t buy saucers for the cups so I used the circles I had left over from the banner as coasters.  The placemats are bamboo cardstock cut using the Artiste cartridge.  The napkin rings are made from a zip strip, flower shape from Artiste and a chocolate brad.


DSC_7127

DSC_7148


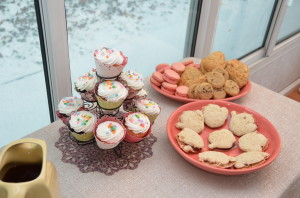
I made some other decorative things for the table using the Cricut.  I even found a teapot cookie cutter and used it to shape the PB&J sandwiches.  It comes in a set of tea cup, pot, and cupcake on Amazon.com.  Every cupcake had it’s own liner that I cut using our awesome Cricut Artiste Cartridge.  I cut them at 2″ but looking back 1.75″ would have been better because they were a little loose.

DSC_7198


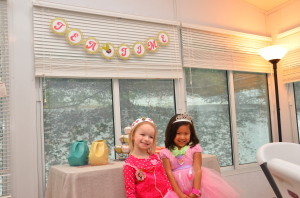
Here are two of the little ladies posing in front of the table and banner before everyone got there.

DSC_7145


I also incorporated the purple base and bling jewels.  These were a great fit.

DSC_7210 The tea party was at noon so I made more of a lunch rather than finger sandwiches and they loved it.

DSC_7214

DSC_7217

And of course they were excited for cupcakes!  I hope you enjoyed seeing what awesome stuff you can do with paper crafting.  If you want to get your Cricut Artiste and Artbooking bundles click here.


Great Weekly Calendar Idea

Posted on

Check out this awesome way to use your Artbooking Cartridge and the coordinating stamp it came with.  I can’t wait to make mine and help us get more organized!  Take a look at this video and become inspired 🙂

https://www.youtube.com/watch?v=VsLOlWKDI1A


If don’t have the Artbooking cartridge yet then click here to order yours today!


Great Artbooking layouts

Posted on

Check out this great video from Close to My Heart.  You’ll find 2 layouts that are created with the Cricut Artbooking cartridge.  Wonderful use of the overlay feature.  Short video that’s definitely great for inspiration.  Please check it out.

If you would like to order the Artbooking Bundle please click here.

Make sure you check out my current specials page!  During the month of March all StudioJ layouts are only $5 each… that’s $2.50 a page and includes a high-res jpeg file.  If you haven’t tried StudioJ before please do it this month.  The layouts are wonderful once you get them.  Unlike other photo books that are printed, the Studio J pages are exposed and are tested to last 100+ years.  Take a look at my gallery and see some of the great layouts I’ve done.